















Craft supplies are difficult to organize because they come in different shapes and sizes. Paper needs flat storage. Fabric takes up more room. Beads require small compartments. Cutting machines need clear space in front and behind them.
A craft room can have plenty of containers and still feel disorganized.
The goal is to make supplies easy to find, use, and return. That requires storage based on your actual projects rather than a collection of unrelated organizers.
This guide covers 15 practical craft room organization ideas. It includes solutions for paper, fabric, yarn, tools, machines, and unfinished projects.
Quick Answer
To organize a craft room:
- Group supplies by craft or activity.
- Keep everyday tools near the main work surface.
- Store paper flat and fabric upright.
- Use shallow containers for small items.
- Give every unfinished project its own tray or box.
- Move refills and occasional supplies to higher or less accessible shelves.
- Keep hazardous products and sharp tools in secure storage.
Avoid buying containers until you have sorted and measured the supplies.
The best system is one that lets you start a project without clearing several boxes first.
Craft Room Organization Ideas at a Glance
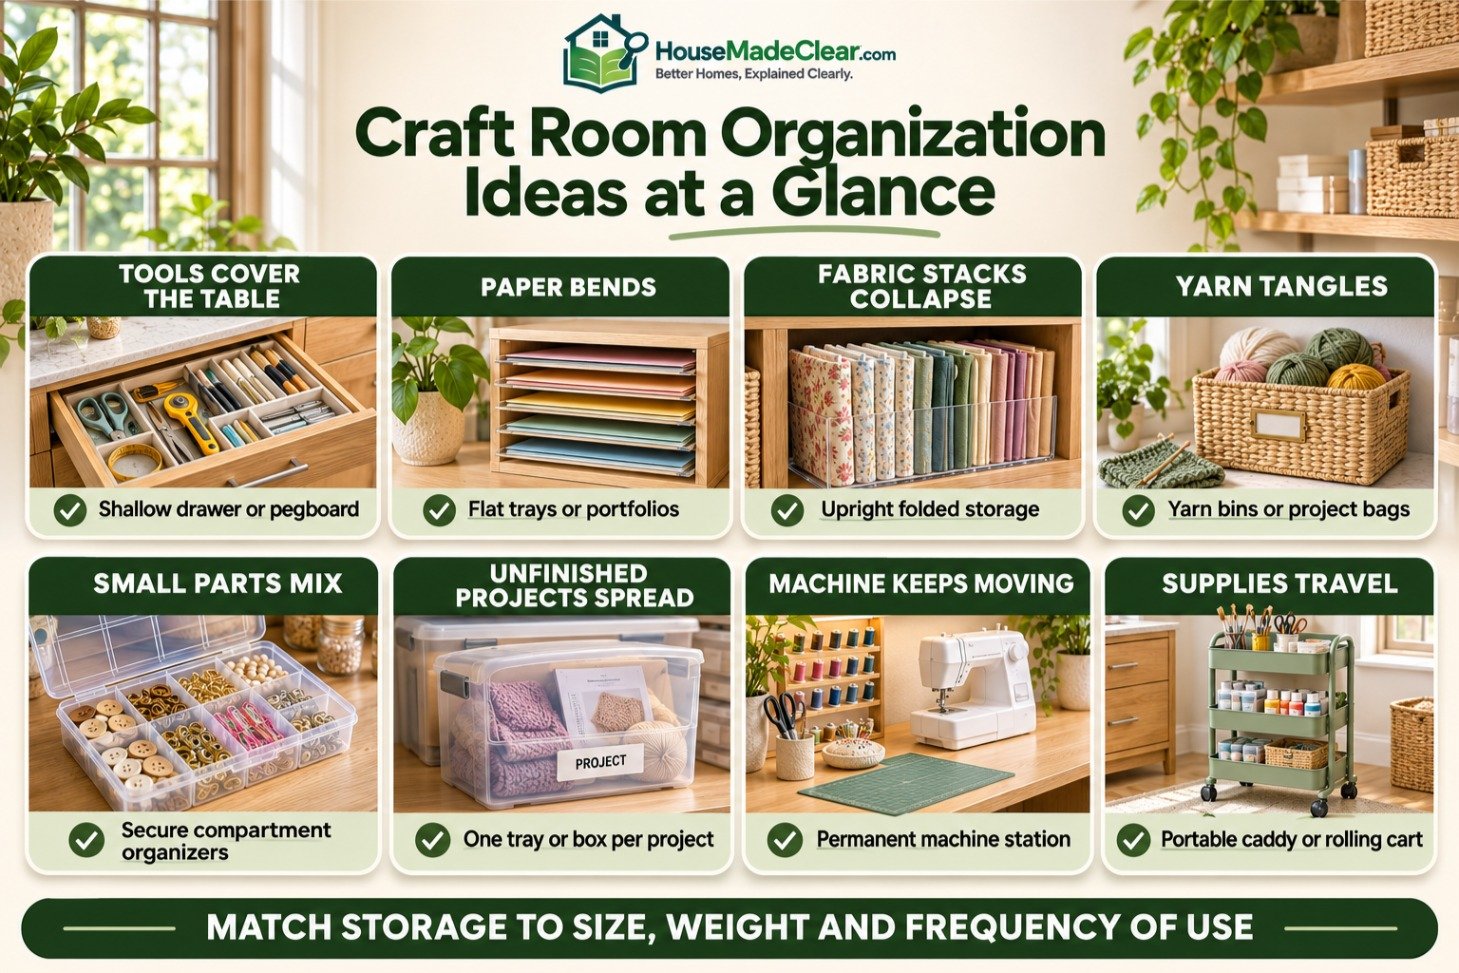
Start with the problem that interrupts your work most often.
| Organization Problem | Practical Solution | Best Storage Location |
|---|---|---|
| Tools cover the table | Shallow drawer or pegboard | Beside or above the work surface |
| Paper becomes bent | Flat trays or portfolios | Cabinet, shelf, or drawer |
| Fabric stacks collapse | Upright folded storage | Open bin or divided shelf |
| Yarn becomes tangled | Yarn bins or project bags | Shelves or closed cabinet |
| Beads and small parts mix together | Compartment organizers | Shallow drawer |
| Unfinished projects take over the room | Individual project trays | Dedicated project shelf |
| Cutting machine keeps moving | Permanent machine station | Clear section of the worktop |
| Supplies are used in another room | Portable caddy or rolling cart | Near the doorway |
| Refills occupy prime storage | Labeled reserve-supply bin | Upper shelf or cabinet |
| Children use the room | Low-accessible craft station | Separate supervised area |
The storage method should match the size, weight, and frequency of use of each item.
How to Organize a Craft Room Step by Step
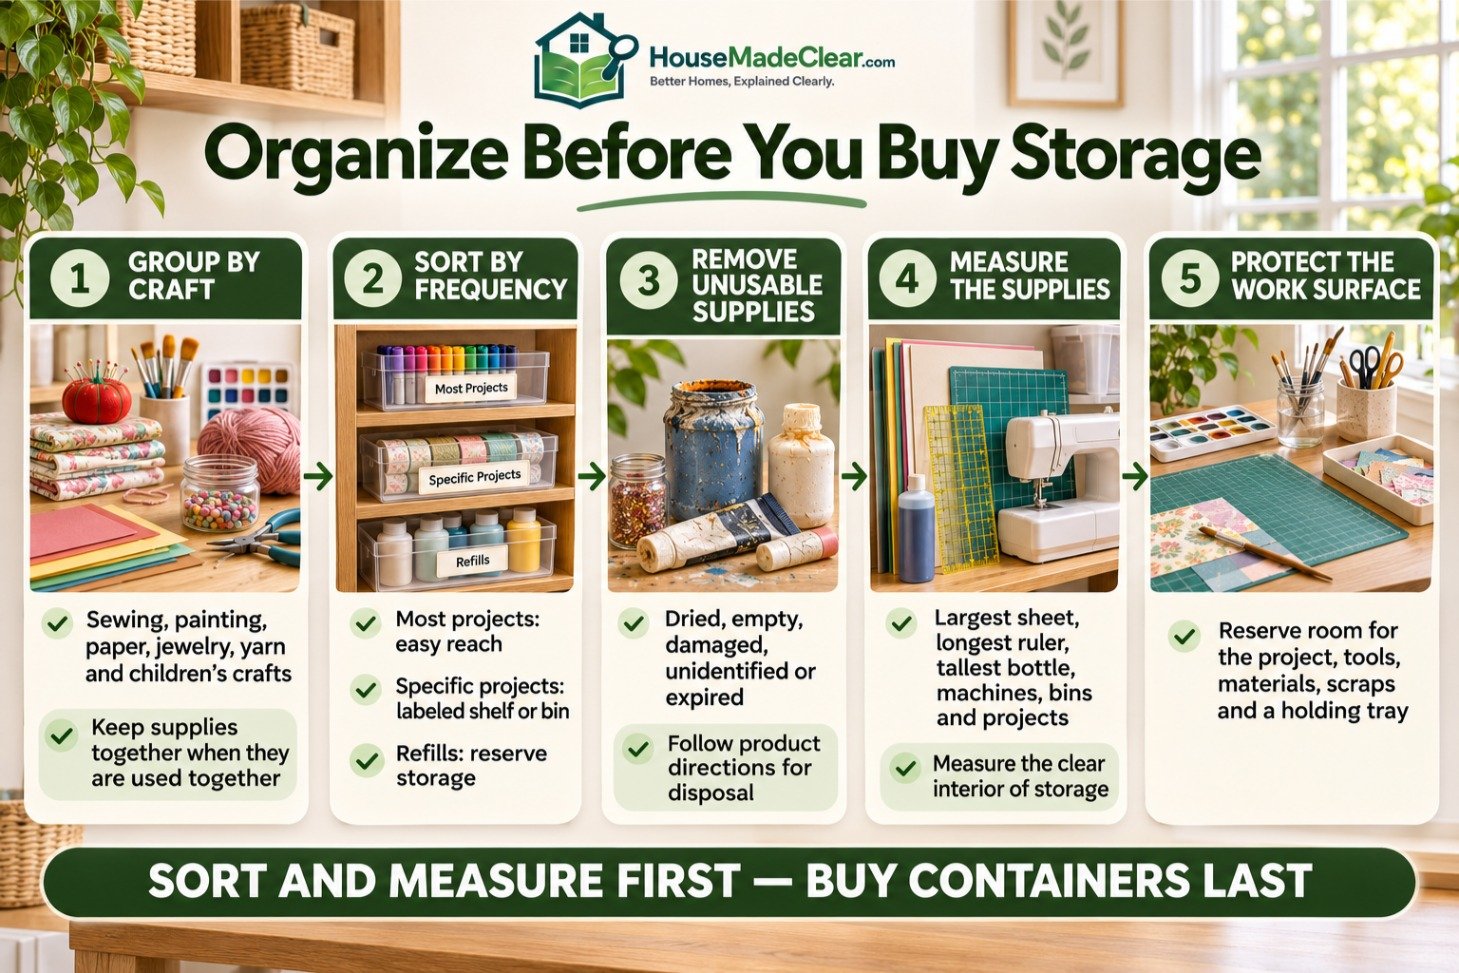
Organize the room before choosing permanent storage.
Step 1: Group Supplies by Craft
Begin with broad activities.
Common categories include:
- Sewing
- Painting
- Drawing
- Paper crafts
- Scrapbooking
- Jewelry making
- Knitting or crochet
- Vinyl cutting
- Model building
- Children’s crafts
Keep supplies together when they are normally used together.
For example, sewing-machine needles, bobbins, seam rippers, and thread can share one area. They do not need to be divided into separate parts of the room.
Shared tools can have their own category.
These may include:
- Rulers
- General-purpose scissors
- Pencils
- Measuring tape
- Cutting mats
- Cleaning cloths
This prevents the same tool from being stored in several project boxes.
Step 2: Sort Supplies by Frequency of Use
Divide each category into three groups.
| Frequency | Suggested Location |
|---|---|
| Used during most projects | Drawer, pegboard, or shelf within easy reach |
| Used for specific projects | Labeled bin or cabinet shelf |
| Refills and bulk supplies | Upper shelf or reserve-storage area |
Frequently used tools should require the fewest movements to retrieve.
Occasional supplies can sit farther from the work surface. Refills should not occupy the drawer you open during every project.
Step 3: Remove Unusable Supplies
Check every category for:
- Dried paint
- Empty adhesive containers
- Damaged tools
- Fabric pieces too small for your projects
- Paper you no longer use
- Unidentified materials
- Incomplete kits
- Expired products
- Duplicate tools in poor condition
Follow the manufacturer’s instructions when disposing of paint, adhesives, solvents, or other chemical products.
Do not combine unidentified products or pour them into ordinary household containers.
Step 4: Measure the Supplies
Measure the items that control your storage choices.
These usually include:
- Largest paper sheet
- Longest ruler
- Widest fabric cut
- Tallest paint bottle
- Largest yarn skein
- Cutting machine
- Cutting mat
- Sewing machine
- Deepest existing bin
- Largest unfinished project
Measure the inside of drawers, cabinets, and containers.
A box may have enough external width but still be too narrow inside for 12 × 12-inch paper.
Step 5: Protect the Main Work Surface
Place the largest tool or mat you use regularly on the table.
Then check how much clear space remains.
A craft table may need room for:
- The active project
- Tools being used
- Uncut materials
- Finished pieces
- Small scraps
- A drying or holding tray
Move storage off the table if it reduces the usable work area too much.
Our guide to standard desk dimensions explains how width, depth, drawers, and nearby furniture affect the usable surface.
1. Create a Dedicated Work Zone
The main work surface should support the activity you perform most often.
A paper crafter may need space for a cutting mat, paper trimmer, and assembly tray. Someone who sews may need room for a machine and fabric to move across the table.
What Should Stay on the Table?
Keep only items used during most sessions.
These may include:
- Cutting mat
- Task light
- Pencil cup
- Small tool tray
- Sewing machine
- Frequently used paper trimmer
Store occasional tools in a drawer or cabinet.
Test the Work Zone
Complete one typical project before fixing the layout.
Check whether you can:
- Reach the main tools
- Move the material freely
- Open nearby drawers
- Place finished pieces somewhere safe
- Clear the table without moving heavy equipment
If the project continually spreads into another area, the work zone may be too small or poorly arranged.
2. Store Everyday Tools in Shallow Drawers
Shallow drawers work well for tools that need to remain visible.
Suitable items include:
- Scissors
- Craft knives
- Rulers
- Pencils
- Brushes
- Marking tools
- Seam rippers
- Tape
- Small cutting tools
Deep drawers allow small tools to disappear beneath one another.
How to Divide the Drawer
Place the tools inside before buying organizers.
Then create sections based on their shapes.
| Drawer Section | Suitable Items |
|---|---|
| Long compartment | Rulers, scissors, brushes |
| Medium compartment | Tape, punches, adhesive |
| Small compartment | Clips, needles, erasers |
| Closed case | Blades and sharp accessories |
Use adjustable dividers when your collection changes frequently.
Check the height of the tools after placing them in the organizer. A tape dispenser or upright handle may prevent the drawer from closing.
3. Install a Pegboard for Frequently Used Tools
A pegboard uses wall space and keeps tools visible.
It works well for:
- Rulers
- Scissors
- Rotary cutters
- Tape
- Small baskets
- Thread
- Lightweight tools
- Frequently used templates
How to Plan the Pegboard
Trace the proposed pegboard size on cardboard.
Hold it against the wall and sit at the table.
Check whether you can reach:
- The top row
- Both corners
- Tools behind the work surface
- Items that must be lifted from hooks
Place longer tools first. Fill the remaining space with smaller items.
Leave enough room above each hook to lift the tool without hitting another item.
Use mounting hardware suitable for the wall and expected load. Keep blades and sharp tools in secure storage if children can enter the room.
4. Store Craft Paper Flat
Paper can curl, sag, or develop damaged corners when stored incorrectly.
Separate it by size before dividing it by color or pattern.
Common groups include:
- Letter-size paper
- 12 × 12-inch cardstock
- Scrapbook paper
- Watercolor paper
- Construction paper
- Specialty sheets
- Finished artwork
Paper Storage Options
| Storage Option | Best For |
|---|---|
| Shallow trays | Frequently used cardstock |
| Wide drawers | Several paper sizes |
| Vertical magazine holders | Small paper collections |
| Portfolios | Large sheets and finished artwork |
| Flat document boxes | Paper kept for longer periods |
| Labeled folders | Small collections and scraps |
Measure the usable interior before buying a tray.
A 12-inch-wide tray may not provide 12 inches of clear internal space.
For valued paper artwork, use suitable protective materials. The Library of Congress guidance on paper storage recommends supportive enclosures, stable conditions, limited light exposure, and flat or properly rolled storage for oversized paper.
5. Create a File for Paper and Vinyl Scraps
Scraps are useful only when you can find and identify them.
Choose the smallest size you are likely to reuse. Pieces below that limit can leave the room.
Simple Scrap Categories
Use separate folders for:
- Plain paper
- Patterned paper
- Specialty cardstock
- Adhesive vinyl
- Heat-transfer vinyl
- Fabric scraps
Label vinyl offcuts while you still know what they are.
The scrap file should have a fixed capacity. Sort it when the folders become difficult to close.
Keep the file near your new materials. This makes it easier to check existing scraps before cutting another full sheet.
6. Fold Fabric Upright
Horizontal stacks look tidy until you need a piece from the bottom.
Folding fabric upright allows you to see each piece and remove it without disturbing the rest.
How to Arrange Fabric
You can organize fabric by:
- Material
- Color
- Project
- Pattern
- Cut size
- Washed and unwashed pieces
Keep large yardage separate from smaller cuts.
Add a removable divider if the fabric falls over when the bin is partly empty.
Label Larger Pieces
Record useful details such as:
- Length
- Width
- Fiber type
- Whether it has been washed
- Intended project
This reduces unnecessary unfolding and measuring.
Measure the shelf with the complete bin in place. Include its handles, lid, and the clearance required to remove it.
Our closet shelf height and spacing guide explains how to calculate usable shelf openings for baskets and storage boxes.
7. Organize Yarn by Weight or Project
Choose the characteristic you check first when selecting yarn.
For many knitters and crocheters, this is yarn weight.
Possible categories include:
- Lace
- Fingering
- Sport
- DK
- Worsted
- Bulky
- Specialty yarn
You can create smaller color groups within each category.
Keep the Label With the Yarn
The label may provide:
- Fiber content
- Yarn weight
- Dye lot
- Recommended needle or hook size
- Washing instructions
- Yardage
Place loose labels inside the skein band or attach the information to the storage bag.
Keep yarn for an active project together with the pattern and tools. A smooth project bag protects the yarn and makes the project portable.
8. Use Compartment Organizers for Beads and Small Parts
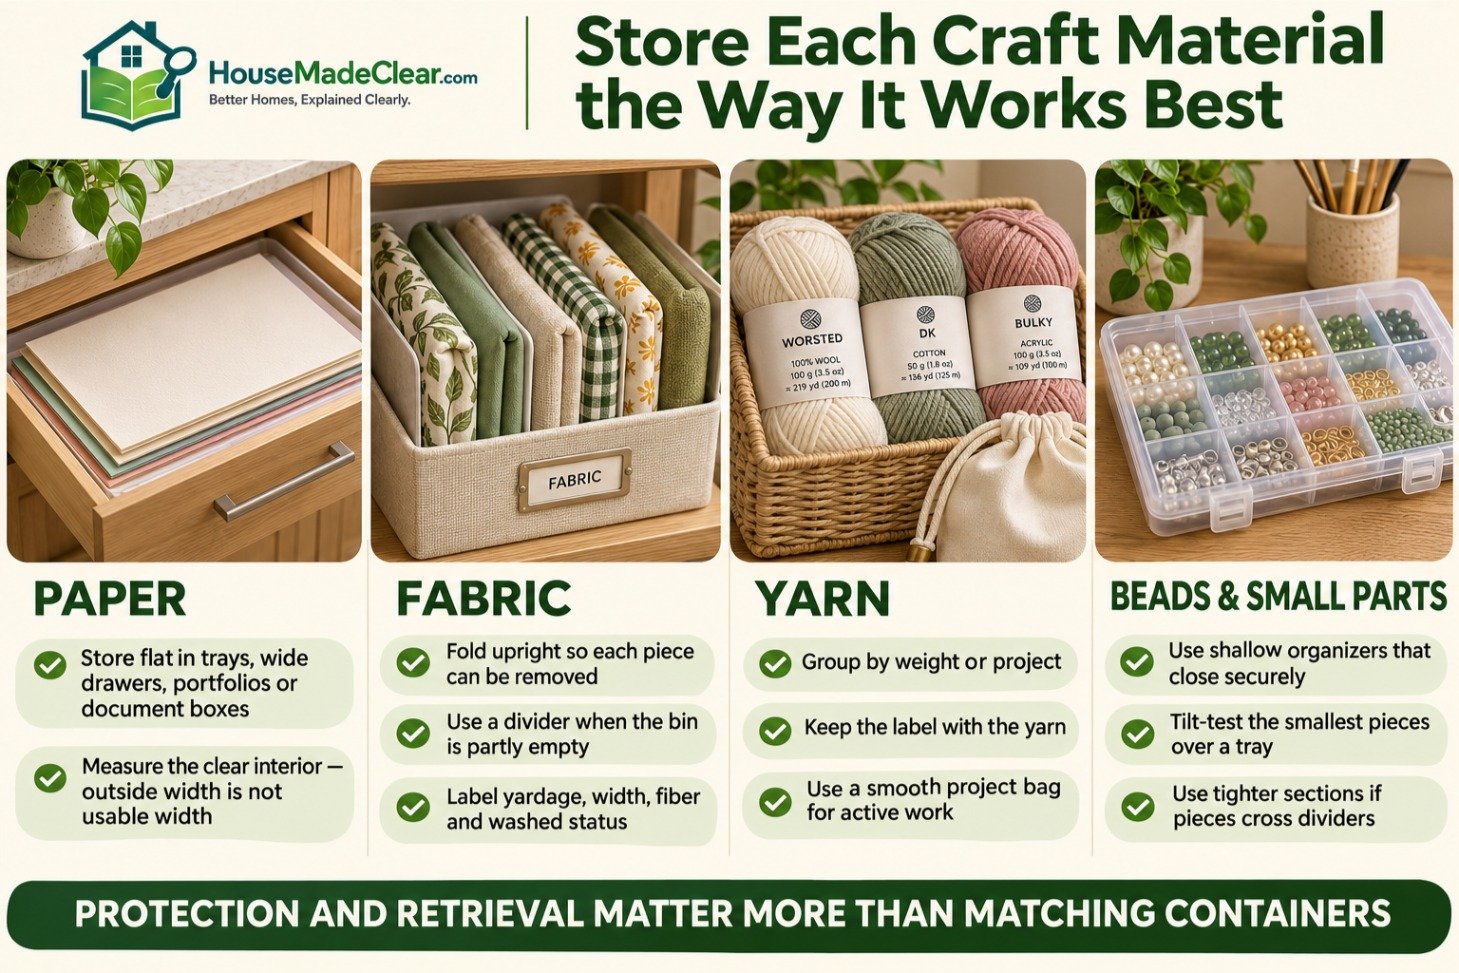
Beads, buttons, clips, findings, and small hardware need containers that close securely.
Shallow organizers make the contents easier to see.
Test the Dividers
Place a few of the smallest pieces inside.
Close the organizer and gently tilt it over a tray.
If the pieces move between sections, choose:
- Tighter compartments
- Individually closing containers
- Small screw-top jars
- Resealable bags inside a larger box
Do not rely on a loose removable divider for very small beads.
Label Similar Items
Add labels when pieces look alike but serve different purposes.
Useful information may include:
- Size
- Material
- Color code
- Finish
- Product number
- Compatible tool
Keep small parts away from young children.
9. Give Thread and Bobbins a Defined Location
Loose bobbins and thread spools can quickly fill a drawer.
Store them where you can compare colors without removing every spool.
Practical Thread Storage Options
- Shallow drawer
- Thread rack
- Compartment box
- Pegboard spool holder
- Lidded thread case
Keep matching bobbins with their spools when possible.
Place frequently used neutral colors in the easiest position. Specialty thread can go in a separate section.
Avoid putting heavy thread collections on an unsuitable wall-mounted rack. Follow the rack manufacturer’s installation and load instructions.
10. Plan a Permanent Machine Station
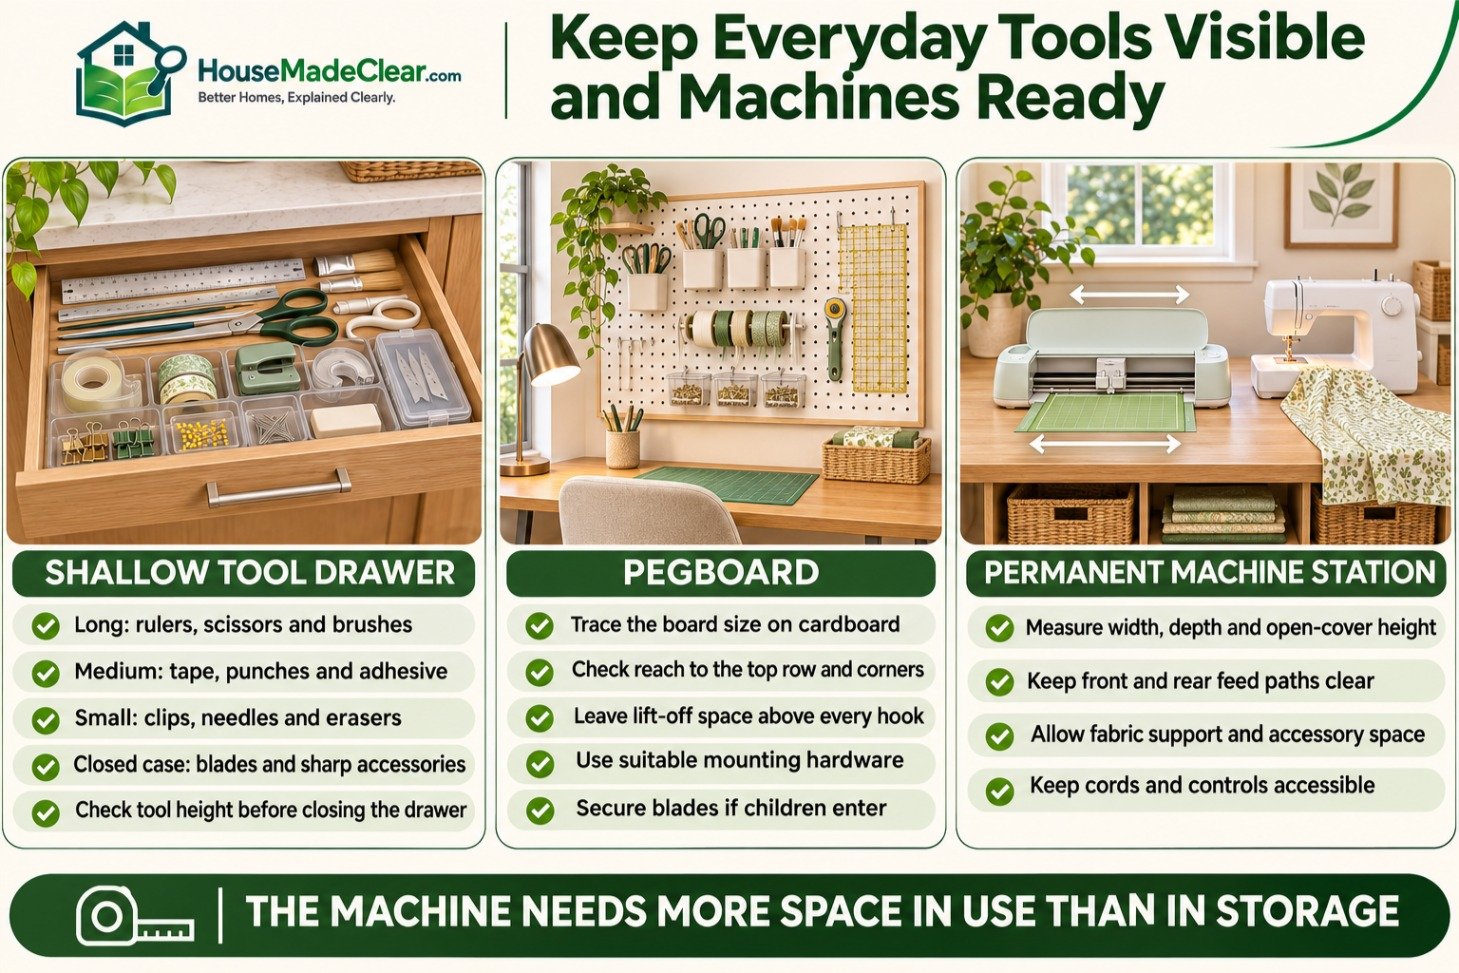
Cutting machines and sewing machines need more room during operation than they do in storage.
A cutting machine may require clear space in front and behind it for the mat. A sewing machine needs room for fabric to move beside and behind the needle area.
Measure the Complete Operating Space
Check:
- Machine width
- Machine depth
- Power-cord location
- Open cover height
- Cutting-mat travel
- Fabric support area
- Accessory attachment space
- Control-panel access
Use the manufacturer’s instructions for operating clearances.
Store Accessories Nearby
Keep frequently changed parts together.
For a sewing machine, this may include:
- Presser feet
- Bobbins
- Machine needles
- Cleaning brush
- Small screwdriver
- Seam guide
For a cutting machine, it may include:
- Blades
- Pens
- Scraping tools
- Replacement mats
- Compatible adapters
Use labeled cases to prevent similar accessories from being mixed.
11. Give Each Unfinished Project Its Own Container
Unfinished projects become clutter when their pieces are spread across the work surface.
Choose a container based on the project.
| Project Type | Suitable Container |
|---|---|
| Scrapbook page | Flat tray |
| Sewing project | Fabric bin or project bag |
| Jewelry project | Shallow lidded box |
| Knitting project | Smooth project bag |
| Paper model | Wide rigid tray |
| Painting project | Drying area followed by a project box |
Keep the instructions, materials, and prepared parts together.
Add a short note that states the next step.
Examples include:
- Cut two lining pieces
- Attach the clasp
- Add the final coat
- Check the size before assembly
- Order replacement adhesive
This makes it easier to restart the project later.
Allow wet paint, glue, or finishes to dry as directed before closing the project inside a container.
12. Use a Rolling Cart for Movable Supplies
A rolling cart works well when crafting happens in more than one room.
It can also serve a shared office, bedroom, or dining area.
How to Arrange the Cart
| Cart Level | Suggested Use |
|---|---|
| Top | Current project and everyday tools |
| Middle | Paper, fabric, or active supplies |
| Bottom | Heavier materials or reserve items |
Keep heavier items on a suitable lower shelf within the cart’s load rating.
Use removable trays for small tools. You can lift the tray onto the table without moving the complete cart.
Measure the Parking Space
Check:
- Cart width including handles
- Cart depth
- Wheel projection
- Turning space
- Doorway width
- Floor thresholds
- Chair clearance
Give the cart a permanent parking spot.
A cart that stays in the walkway creates another storage problem.
If the craft area shares a home office, our guide to organizing a home office covers closed storage, rolling carts, and ways to contain supplies in multipurpose rooms.
13. Store Paint, Glue, and Finishes in a Dedicated Cabinet

Place paints, adhesives, finishes, and related materials in a defined storage area.
Keep manufacturer labels intact.
The U.S. Consumer Product Safety Commission’s Art and Craft Safety Guide advises against using food containers for material storage. It also recommends keeping containers closed and retaining complete label information if a damaged container must be replaced.
Cabinet Organization
Use separate trays for:
- Paint
- Adhesives
- Finishes
- Cleaning products
- Protective equipment
Store products according to their labels.
Keep incompatible materials apart when their instructions require separation.
Check Products Regularly
Look for:
- Loose caps
- Leaks
- Damaged packaging
- Missing labels
- Expired materials
- Hardened contents
- Containers that have changed shape
Keep products requiring adult handling in secure storage.
Do not place food or drinks inside the craft-material cabinet.
14. Use Shelves for Bins and Reserve Supplies
Shelves work best for items that can be removed as a complete group.
Examples include:
- Fabric bins
- Paper refills
- Seasonal supplies
- Unopened kits
- Bulk adhesive
- Extra canvases
- Infrequently used tools
Choose the Correct Shelf Depth
Shallow shelves make small containers easier to see.
Deeper shelves can hold larger bins, but items at the back may become hidden.
Measure:
- Bin width
- Bin depth
- Bin height
- Handle height
- Lid clearance
- Space needed for your hands
Leave enough clearance to lift and remove each container.
Place heavy supplies on shelves that can support the load and remain comfortable to access. Install wall-mounted shelving with hardware suitable for the wall and expected weight.
A portable kit is useful when the dining table, home-office desk, or kitchen island becomes the temporary craft area.
Build the kit around one activity.
Example Paper-Craft Kit
It may contain:
- Card blanks
- Envelopes
- Adhesive
- Scissors
- Pencil
- Small ruler
- Two or three stamps
- Current paper selection
- Scrap envelope
Keep seasonal supplies and refills in the main storage area.
Example Sewing-Repair Kit
It may contain:
- Hand-sewing needles
- Neutral thread
- Small scissors
- Pins
- Measuring tape
- Seam ripper
- Common buttons
Choose a container you can carry in one trip.
Test it on the table before filling it. The container should leave enough space for the actual project.
Store a washable work mat with the kit if the shared surface needs protection.
Craft Room Storage by Activity
Different crafts need different storage systems.
| Craft Activity | Best Storage Approach | Main Planning Issue |
|---|---|---|
| Sewing | Upright fabric bins, thread storage, machine station | Fabric movement and machine space |
| Scrapbooking | Flat paper trays, project folders, shallow drawers | Paper size and protection |
| Painting | Brush storage, paint cabinet, drying area | Product storage and wet work |
| Jewelry making | Secure compartment boxes and shallow trays | Preventing small pieces from mixing |
| Knitting and crochet | Yarn bins and portable project bags | Keeping labels and projects together |
| Vinyl cutting | Roll storage, flat sheet storage, machine station | Cutting-mat feed path |
| Children’s crafts | Low trays for approved supplies and secured adult storage | Supervision and safe access |
| Model making | Rigid project trays and small-part organizers | Protecting unfinished assemblies |
Use separate storage when materials can damage one another.
For example, keep wet painting materials away from paper collections and unfinished fabric projects.
Small Craft Room Layout Ideas
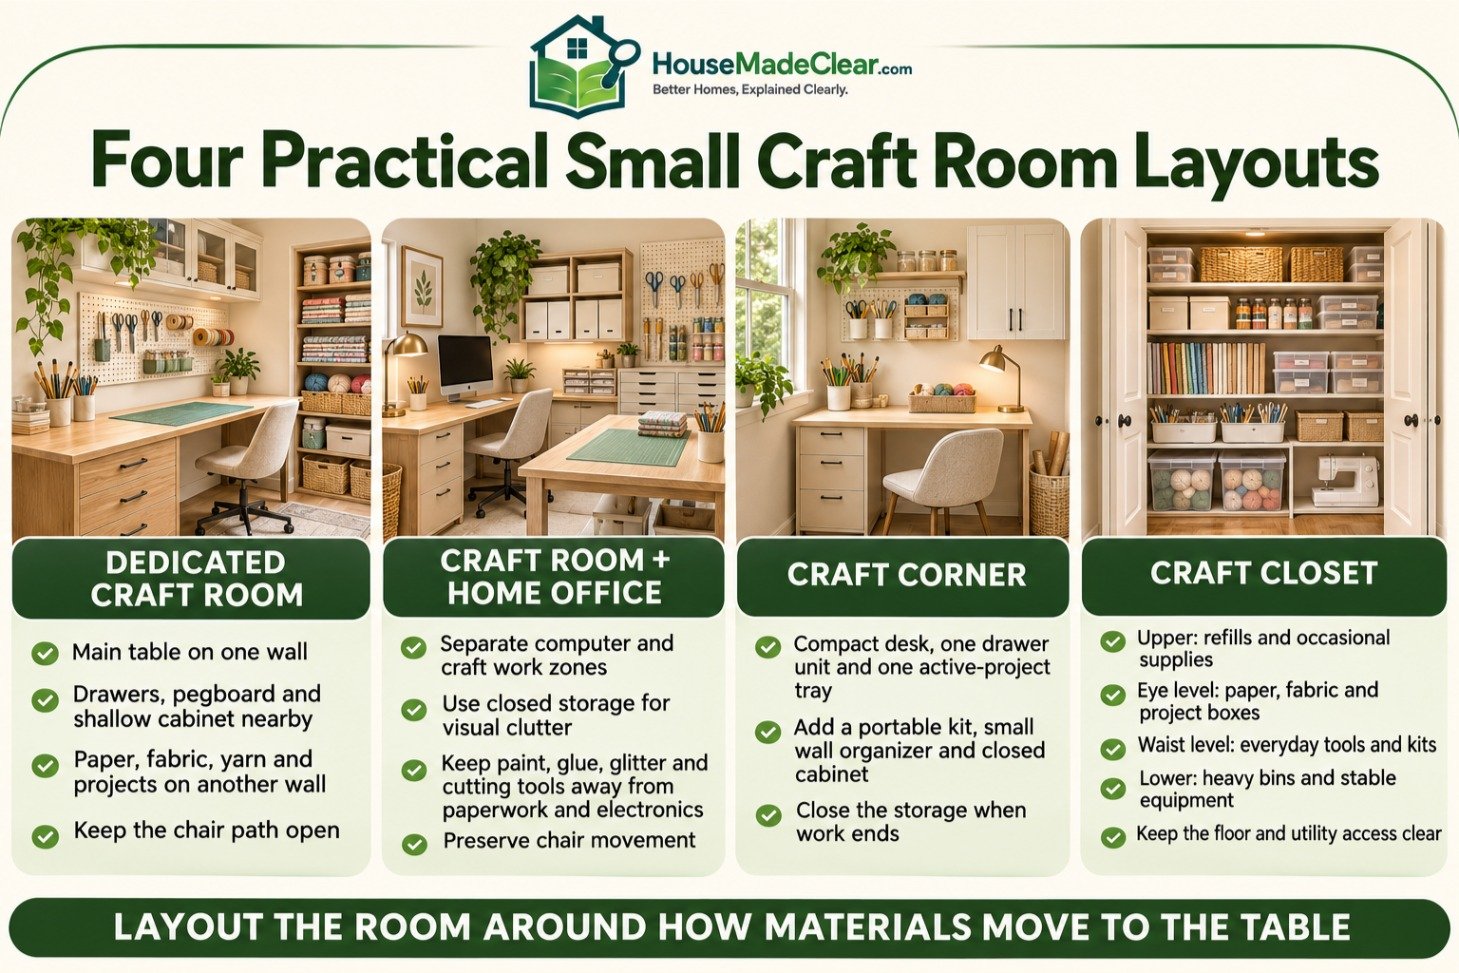
The room layout should reflect how supplies move from storage to the table.
Layout 1: Dedicated Craft Room
Use one wall for the main table.
Place frequently used tools in:
- Drawers below the table
- A pegboard above it
- A shallow cabinet beside it
Use another wall for:
- Paper
- Fabric
- Yarn
- Reserve supplies
- Unfinished projects
Keep the area behind the chair open.
Layout 2: Craft Room and Home Office
Divide the room into two work zones.
| Office Zone | Craft Zone |
|---|---|
| Computer and keyboard | Cutting mat or sewing machine |
| Office paperwork | Craft paper and fabric |
| File storage | Project trays |
| Charging cables | Craft tools |
| Office chair movement | Material-handling space |
Use closed storage for craft supplies that create visual clutter.
Keep paint, glue, glitter, scraps, and cutting tools away from office paperwork and electronics.
Do not store boxes behind the chair. Check our guide to space needed behind a desk chair when planning drawers, carts, and circulation.
Layout 3: Craft Corner in a Bedroom or Living Room
Use a compact desk with:
- One drawer unit
- A portable kit
- One closed cabinet
- A small wall organizer
- One tray for the active project
Avoid filling the surrounding room with separate craft containers.
Choose storage that can close when the work ends.
Layout 4: Craft Closet
Use the closet for supplies and a nearby table for projects.
Organize the closet into four levels.
| Closet Level | Suggested Use |
|---|---|
| Upper shelf | Refills and occasional supplies |
| Eye level | Paper, fabric, and project boxes |
| Waist level | Everyday tools and portable kits |
| Lower level | Heavy bins and stable equipment |
Keep the closet floor clear enough to remove the lower containers.
Do not block ventilation openings, electrical panels, or access to utilities.
Example: Organizing a 48 × 24-Inch Craft Desk

Suppose the desk measures 48 inches wide and 24 inches deep.
Your cutting mat measures 24 × 18 inches.
Place the 24-inch side of the mat along the desk width. This uses:
- 24 inches of desk width
- 18 inches of desk depth
That leaves:
- 24 inches of width beside the mat
- 6 inches of depth behind the mat
The remaining space may appear sufficient for a desktop organizer. However, the mat might need to slide backward or forward during cutting.
A better layout could be:
| Desk Area | Use |
|---|---|
| Left 24 inches | Cutting mat |
| Right 24 inches | Tool tray and project pieces |
| Wall above desk | Pegboard |
| Drawer below desk | Everyday hand tools |
| Cabinet beside desk | Paper and reserve supplies |
| Shelf away from desk | Unfinished projects |
Test the setup with a complete project.
Open the drawer and pull the chair back. Place an uncut sheet, the current piece, and the tools on the desk.
If the right side becomes overcrowded, move the tool tray to a drawer or pegboard.
Common Craft Room Organization Mistakes
| Mistake | Why It Causes Problems | Better Approach |
|---|---|---|
| Buying containers before sorting | The containers may not fit the supplies | Sort, measure, and then choose storage |
| Using deep bins for small items | Supplies become hidden | Use shallow trays or smaller containers |
| Filling every wall | The room feels crowded | Keep one clear work and movement zone |
| Storing everything by color | Similar materials become mixed | Group by material or activity first |
| Leaving unfinished projects on the table | The work surface becomes unusable | Assign one container to each project |
| Keeping refills near the desk | Prime storage becomes crowded | Move unopened supplies to reserve storage |
| Ignoring machine operating space | Mats or fabric hit the wall | Measure the full operating path |
| Using identical labels for broad categories | Boxes remain difficult to search | Use specific labels |
| Keeping too many scraps | Scrap storage becomes unusable | Set a minimum reusable size |
| Storing hazardous products with children’s supplies | Unsafe products become accessible | Use separate, secured storage |
Ten-Minute Craft Room Reset
Use a short reset after each session.
- Return shared tools to their drawer or pegboard.
- Place reusable scraps in the correct folder.
- Remove waste from the table.
- Put unused materials back in storage.
- Close paint, glue, and other products.
- Move unfinished work into its project container.
- Add a note describing the next step.
- Place finished work in its drying or storage area.
- Wipe the work surface when appropriate.
- Leave enough clear space to begin the next session.
If this takes much longer than ten minutes, some supplies may be stored too far away or divided into too many categories.
Craft Room Organization Checklist
Before finalizing the room, check the following:
- Supplies are grouped by craft or activity
- Everyday tools are within easy reach
- The main work area remains clear
- Paper storage fits the largest sheet
- Fabric can be removed without disturbing every piece
- Yarn labels remain with the yarn
- Small parts stay inside their compartments
- Machine operating space has been tested
- Each active project has a container
- Rolling carts have a parking location
- Shelves fit the complete bins and handles
- Heavy supplies are stored securely
- Product labels remain visible
- Sharp tools and hazardous products are secured
- The chair and doorway can move freely
- Refills do not occupy prime storage
- Finished and unfinished work are stored separately
Frequently Asked Questions
How do I organize a craft room with lots of supplies?
Group supplies by activity and then by frequency of use. Keep everyday tools near the work surface. Move refills, seasonal materials, and occasional equipment to higher shelves or closed cabinets. Use shallow storage for small items and larger bins for complete project groups.
How do I organize craft supplies without a craft room?
Use one cabinet or shelf for the main collection. Create a portable kit for the activity you do most often. Keep the current project in one tray or bag so it can move to and from a shared table in one trip.
What should I buy first for craft room organization?
Buy the organizer that solves the most disruptive problem. This might be a paper tray wide enough for your sheets, a compartment box that keeps beads separated, or a project container that clears the table. Sort and measure before purchasing.
How do I organize a small craft room on a budget?
Reuse suitable boxes, trays, jars, and dividers you already own. Test the layout with temporary containers. Buy permanent storage only after you know the required dimensions and location. Avoid transferring chemical products into food containers or unlabeled jars.
How should I store unfinished craft projects?
Give each project a container that fits its shape. Use a flat tray for paper projects, a smooth bag for knitting, or a rigid box for models. Keep the instructions, prepared parts, and next-step note with the project.
Is open or closed craft storage better?
Open storage works well for frequently used tools and materials that remain visually tidy. Closed storage is more suitable for refills, mixed supplies, chemical products, and visual clutter. Many craft rooms need both.
How do I stop craft supplies from taking over the table?
Remove organizers that permanently reduce the working area. Store everyday tools in drawers, a pegboard, or a nearby cart. Give unfinished projects their own containers and reset the table after each session.
How should craft supplies be organized for children?
Provide a small selection of age-appropriate supplies in containers children can carry and return. Use simple labels or pictures. Store adult tools, hazardous products, and small parts in a separate secured location. Supervise activities according to the child’s age and the materials being used.
Final Thoughts
An organized craft room should make projects easier to begin and easier to pause.
Start with the work surface. Keep everyday tools close. Match storage to the material, and give unfinished work a defined location.
Measure paper, machines, bins, shelves, and chair movement before purchasing furniture.
Once each supply has a practical home, a short reset is usually enough to prepare the room for the next project.







[…] Craft Room Organization Ideas: 15 Practical Storage Solutions […]
[…] Craft Room Organization Ideas: 15 Practical Storage Solutions […]
[…] Craft Room Organization Ideas: 15 Practical Storage Solutions […]