















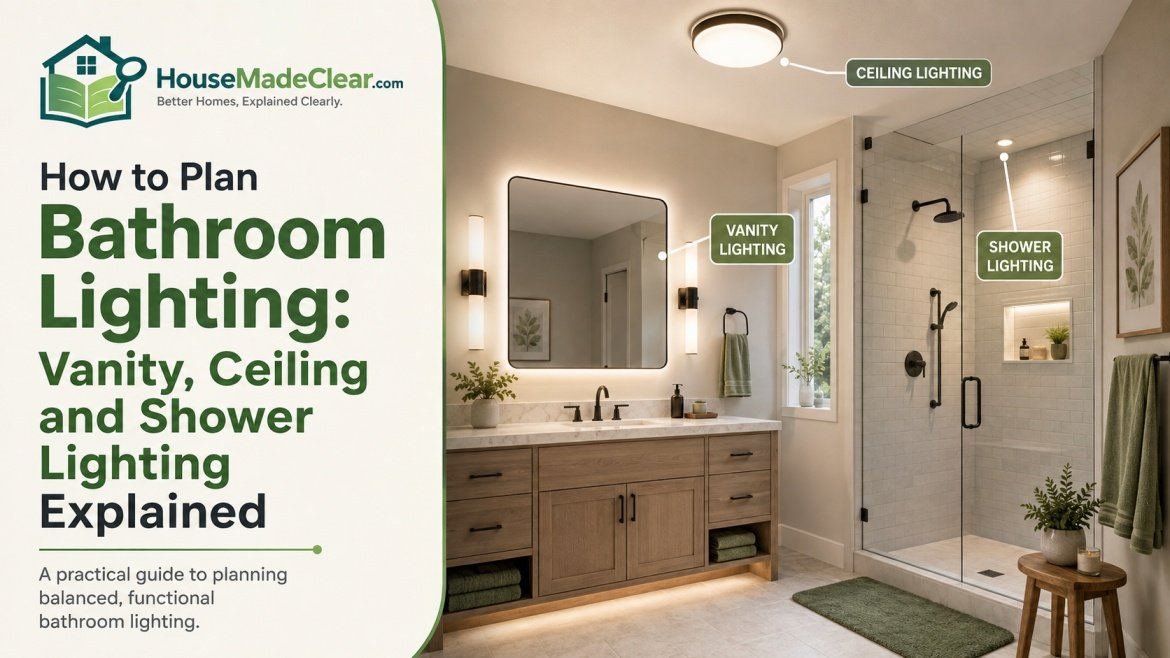
Bathroom lighting has to do more than make the room look attractive.
It should provide clear light for shaving, skincare and makeup, help people move safely at night, reduce harsh shadows around the mirror and remain suitable for a room where moisture and electricity are present together.
A bathroom with one bright ceiling fixture may still feel poorly lit. The light may fall from directly above, creating shadows under the eyes and chin. A decorative pendant may look impressive but provide little useful light at the vanity. A shower fixture may be bright enough but unsuitable for its location.
The best bathroom-lighting plan normally combines several layers rather than relying on one fitting.
Quick answer:
Start with useful light at the mirror, add general ceiling lighting for the room and use appropriately rated fixtures in shower or wet areas. Plan switching, dimming and nighttime lighting before installation, and have fixed electrical work completed by a qualified professional according to local requirements.
Why Bathroom Lighting Needs a Separate Plan
Bathrooms combine several activities with different lighting needs.
A person may use the room for:
- Shaving
- Applying makeup
- Skincare
- Showering
- Bathing
- Cleaning
- Dressing
- Relaxing
- Using the bathroom during the night
One fixture rarely supports all of these activities equally well.
Bright task lighting may be useful at the mirror but uncomfortable during an evening bath. Soft ambient lighting may create a calm atmosphere but provide inadequate facial illumination. A shower may need its own light because a wall or curtain blocks the main ceiling fixture.
A functional plan therefore considers:
- Where each activity happens
- How light reaches the face
- Whether fixtures are exposed to moisture
- How light reflects from mirrors and surfaces
- Natural daylight
- The room’s size and ceiling height
- Who uses the bathroom
- How the lights will be controlled
Understand the Three Main Layers of Bathroom Lighting
Most bathrooms benefit from a combination of ambient, task and accent lighting.
Ambient Lighting
Ambient lighting provides general illumination throughout the room.
Possible sources include:
- Ceiling-mounted fixtures
- Recessed downlights
- Flush or semi-flush fittings
- Suitable pendant lights
- Indirect cove lighting
Ambient light should help people see the room clearly and move between the door, vanity, toilet, bath and shower.
It should not be expected to handle every detailed task by itself.
Task Lighting
Task lighting supports activities that require clearer visibility.
In a bathroom, the most important task area is usually the vanity mirror.
Task lighting may include:
- Vertical lights beside the mirror
- A horizontal light above the mirror
- An illuminated mirror
- A combination of side and overhead lighting
- Adjustable lighting for a shared vanity
The objective is to illuminate the face evenly without producing strong shadows or uncomfortable glare.
Accent Lighting
Accent lighting adds visual depth or highlights selected features.
It may be used for:
- A textured wall
- Artwork suitable for the environment
- A recessed niche
- Floating vanity
- Decorative shelving
- Architectural detail
- Freestanding bath
Accent lighting is optional. It should be added only after the room has adequate ambient and task lighting.
Step 1: Map the Bathroom Before Selecting Fixtures
Begin with the room layout rather than the appearance of individual lights.
Mark:
- Entrance
- Vanity
- Mirror
- Toilet
- Shower
- Bath
- Windows
- Ceiling height
- Existing electrical points
- Ventilation
- Cabinet doors
- Shower screens
- Towel storage
- Niches
- Sloped ceilings
Then identify where light is needed.
For example:
| Area | Main lighting need |
|---|---|
| Vanity | Clear facial illumination |
| General floor area | Safe movement and cleaning |
| Shower | Direct wet-area illumination |
| Bath | Comfortable ambient light |
| Toilet | General or low-level light |
| Storage | Visibility inside cabinets |
| Night route | Low-glare orientation light |
A small bathroom may need fewer fixtures, but it still benefits from separate planning for the mirror, general room and shower.
Step 2: Use Natural Light Without Depending on It
A bathroom window can provide useful daytime light, but natural light changes according to:
- Time of day
- Season
- Weather
- Window direction
- Privacy glass
- Curtains or blinds
- Nearby buildings
- Exterior planting
Plan the electrical lighting for the darkest normal conditions, not only for a bright afternoon.
Protect Privacy Without Blocking All Daylight
Possible treatments include:
- Frosted glass
- Privacy film
- Adjustable blinds
- Shutters
- Top-down window coverings
- Textured glazing
Select materials suitable for bathroom humidity and follow the product’s installation guidance.
Check Mirror Position Against the Window
A window behind the person can create strong backlighting. The mirror may show the face as dark even when the room appears bright.
A window directly behind the mirror can be difficult to accommodate, while strong side light may create uneven facial illumination.
The artificial vanity lighting should correct these changes rather than amplify them.
Step 3: Plan Vanity Lighting Around the Face
Vanity lighting is usually the most important part of the bathroom-lighting plan.
The aim is not simply to make the mirror bright. The aim is to illuminate the person using it.
Why One Ceiling Light Often Fails at the Mirror
A ceiling fixture positioned behind or directly above the user may cast shadows beneath:
- Eyebrows
- Eyes
- Nose
- Cheeks
- Chin
This can make shaving, skincare and makeup more difficult.
Adding stronger ceiling bulbs may increase brightness without correcting the direction of the light.
Side Lighting Beside the Mirror
Vertical lights on both sides of the mirror can provide more balanced facial illumination.
This arrangement may reduce shadows because light reaches the face from two directions.
It works particularly well when:
- The mirror has wall space on both sides
- The vanity serves one or two users
- Fixtures are positioned at a practical facial level
- The fittings diffuse light rather than expose a harsh point source
The exact mounting position depends on the fixture, mirror dimensions, user heights and electrical constraints.
Avoid placing side lights so far apart that most of the light misses the face.
Lighting Above the Mirror
An above-mirror fixture may be practical where side space is limited.
Choose a fitting that spreads light across the vanity rather than creating a narrow bright area.
It may work better when:
- The mirror is wide
- The ceiling is low
- Wall space is restricted
- The fixture has good diffusion
An overhead vanity light can still produce some downward shadowing, so assess the result before relying on it as the only task light.
Illuminated Mirrors
An illuminated mirror can create a clean appearance and useful facial light.
Check:
- Whether the light faces outward or only glows behind the mirror
- Brightness
- Colour quality
- Dimming
- Replaceability
- Electrical rating
- Anti-fog function
- Installation requirements
A backlit mirror may create an attractive wall glow without providing enough forward task light. Do not assume every illuminated mirror performs the same function.
Double-Vanity Lighting
A long shared vanity may need:
- One light on each outer side
- A central light between two mirrors
- Separate lights for each mirror
- A continuous fixture designed for the full width
Make sure each user receives balanced light rather than leaving the centre or outer sides noticeably darker.
Step 4: Control Glare Around the Mirror
Bathrooms contain many reflective surfaces:
- Mirror
- Glossy tiles
- Glass shower screen
- Chrome fittings
- Polished stone
- White basins
- High-gloss cabinetry
Poorly positioned lighting may reflect directly into the eyes.
Reduce glare by using:
- Diffused shades
- Frosted covers
- Indirect lighting
- Appropriate fixture angles
- Matte or lower-gloss finishes where suitable
- Dimming
- Multiple moderate sources instead of one exposed bright source
Stand at the normal viewing position and check the mirror from different heights.
A fixture that seems comfortable when the room is empty may create distracting reflections when someone stands at the vanity.
Finalize the basin, faucet and mirror centerlines before locating vanity lights. Our bathroom sink size guide explains the measurements that should be confirmed first.
Step 5: Choose General Ceiling Lighting
Ceiling lighting should distribute enough light for:
- Movement
- Cleaning
- Storage access
- Dressing
- General use
The number and position of fixtures depend on:
- Bathroom size
- Ceiling height
- Wall colours
- Surface reflectance
- Shower enclosures
- Vanity lighting
- Natural light
- Fixture output and beam spread
Flush or Semi-Flush Ceiling Fixtures
These can work well in bathrooms with:
- Standard or low ceilings
- Smaller floor areas
- A central wiring position
- A need for broad general light
Choose a fixture suitable for the environment and avoid designs that collect dust or moisture unnecessarily.
Recessed Downlights
Downlights can provide discreet general lighting, but spacing matters.
Common mistakes include:
- Positioning every light in a straight line regardless of the layout
- Placing a downlight directly above a person at the mirror
- Leaving corners dark
- Using narrow beams
- Installing too many fixtures
- Creating a ceiling covered with bright spots
Plan downlights around functional areas rather than distributing them only by mathematical spacing.
A downlight near the vanity should support the mirror lighting, not replace it.
Pendant Lighting
Pendant lights can add character in a larger bathroom, but placement requires care.
Consider:
- Ceiling height
- Moisture exposure
- Bath and shower location
- Door movement
- Head clearance
- Cleaning
- Local electrical rules
- Whether the fixture is approved for the proposed position
Do not place a decorative pendant in a wet or restricted area simply because it appears in an inspiration photograph.
Step 6: Light the Shower Properly
A shower may remain dark even when the rest of the bathroom is well lit.
This is especially common when the shower has:
- Full-height tiled walls
- A curtain
- Frosted glass
- A deep enclosure
- Dark tiles
- A ceiling below the main room ceiling
- A position far from the central fixture
A dedicated shower light can improve:
- Visibility
- Cleaning
- Product identification
- General comfort
Use a Fixture Suitable for the Location
A bathroom is divided into safety areas differently across jurisdictions, and the correct product rating depends on exactly where it is installed.
In the UK, Electrical Safety First explains that bathroom electrical equipment must be appropriate for its zone and that bathroom circuits require RCD protection under current wiring requirements. It also notes that the required IP rating must be suitable for the external influences at the specific location.
In the US, products may be marked for dry, damp or wet locations. A wet-location product is designed for greater direct moisture exposure than one rated only for damp conditions. Product listing and the local electrical code should determine whether a fixture is suitable for a shower or nearby area.
Do not rely only on the fixture’s appearance or a seller’s general description.
Avoid Positioning the Light Directly for Glare
A shower downlight placed directly above a polished showerhead or glass panel may produce reflections.
Test how the light interacts with:
- Glass
- Chrome
- Glossy tiles
- Water
- Niches
- Shelves
A diffused or wider-beam fixture may provide a more comfortable result than a narrow bright spotlight.
Step 7: Plan Lighting Around the Bath
Bath lighting should support both practical cleaning and quieter evening use.
Possible approaches include:
- General ceiling lighting
- Wall lighting
- Indirect lighting
- Dimmable ambient lighting
- Niche lighting
- Lighting outside the immediate wet area
Avoid placing fixtures where they can be touched from the bath unless the installation is specifically permitted and designed for that location.
Local electrical rules determine what equipment may be installed around a bath or shower. This should be resolved by the project’s electrician before fixtures are purchased.
Step 8: Choose an Appropriate Light Colour
Light colour is commonly expressed as colour temperature in kelvins.
Lower colour temperatures appear warmer or more yellow, while higher values appear whiter or cooler. ENERGY STAR explains that warm-looking fixtures commonly fall around 2200–3000 K, whiter light around 3500–4100 K and bluer white light around 5000–6500 K.
There is no single ideal colour temperature for every bathroom.
Warmer Light
Warmer light may suit:
- Relaxing evening bathrooms
- Traditional interiors
- Warm timber and stone
- Bath areas
- Softer ambient lighting
Neutral or Whiter Light
A more neutral white may suit:
- Vanity tasks
- Contemporary bathrooms
- Detailed grooming
- Rooms with cooler finishes
- Daylight-style clarity
A very warm ceiling fixture combined with a noticeably cool mirror can make surfaces and skin tones appear inconsistent.
Use a deliberate plan.
For example:
- Consistent neutral light throughout
- Slightly warmer ambient light with clearer vanity lighting
- Adjustable fixtures where different moods are required
Check the actual products together before installation.
Step 9: Consider Colour Rendering
Colour rendering affects how accurately colours appear under artificial light.
This matters at the vanity because users may need to judge:
- Skin tone
- Makeup
- Hair colour
- Clothing
- Surface finishes
Look for lighting that describes its colour-rendering performance clearly rather than selecting products only by wattage or brightness.
Two lamps with the same stated colour temperature can still render colours differently.
The final decision should be based on product data, samples where possible and the needs of the household.
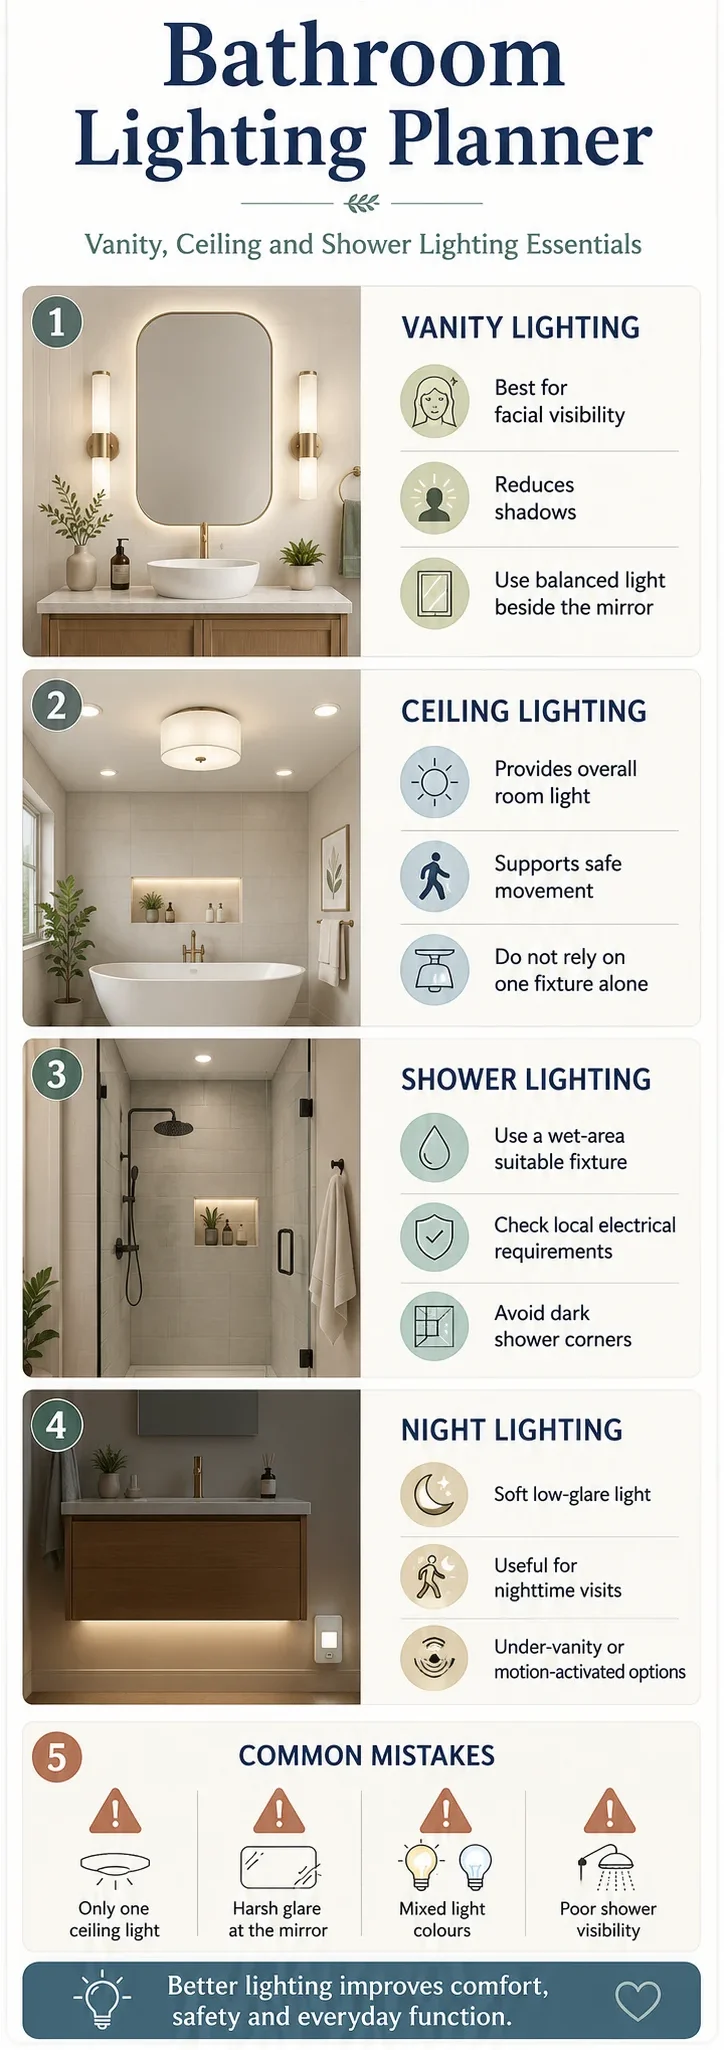
Step 10: Plan Brightness by Zone
The whole bathroom does not need to be uniformly bright.
Instead, direct more useful light toward:
- Vanity
- Shower
- Storage
- Main movement areas
Use softer or adjustable light near:
- Bath
- Night route
- Decorative features
Avoid One Extremely Bright Source
One powerful ceiling fitting may cause:
- Glare
- Strong shadows
- Uneven corners
- Uncomfortable nighttime use
- Excessive mirror reflection
Several controlled sources can provide more useful illumination than one intense fixture.
Consider Surface Colours
Dark surfaces absorb more light, while pale or reflective finishes return more light into the room.
A bathroom with:
- Dark wall tiles
- Dark ceiling
- Matte black surfaces
- Deep cabinetry
may need a different lighting plan from a similarly sized white bathroom.
Step 11: Add Dimming Where It Is Useful
Dimming allows one lighting layer to support different activities.
It may be useful for:
- Evening baths
- Nighttime use
- Early mornings
- Guest bathrooms
- Reducing glare
- Adjusting for natural daylight
Check compatibility among:
- Dimmer
- Lamp
- LED driver
- Illuminated mirror
- Smart control
An LED fixture described as dimmable may still require a particular type of compatible control.
Step 12: Plan Night Lighting
A bright overhead light can feel uncomfortable during nighttime bathroom visits.
Possible low-level solutions include:
- Under-vanity lighting
- Low wall light
- Toe-kick lighting
- Motion-activated night light
- Dimmable ceiling light
- Illuminated switch
- Hall-to-bathroom route lighting
Night lighting should provide enough orientation to see:
- Floor changes
- Doorway
- Toilet
- Vanity edge
- Obstacles
It should not create glare at eye level or spill unnecessarily into nearby bedrooms.
Use Motion Sensors Carefully
Motion activation can be useful, but poor settings may cause the light to:
- Turn off while someone is in the shower
- Activate from hallway movement
- Switch on too brightly
- Remain on unnecessarily
- Fail to detect movement behind an enclosure
Choose an appropriate sensor type and test its coverage in the completed room.
Step 13: Coordinate Lighting With Ventilation and Controls
Bathroom switches may control:
- General light
- Vanity light
- Shower light
- Fan
- Heated mirror
- Accent light
- Night light
Group controls logically.
A user should not need to experiment with several unidentified switches.
Consider:
- Clear labelling
- Separate vanity control
- Separate ambient control
- Fan timer
- Sensor control
- Dimmer position
- Smart-home integration
Do not make basic lighting dependent only on an app or internet connection. Essential bathroom lights should remain straightforward to operate.
Step 14: Use Smart Lighting Selectively
Smart controls may provide:
- Scheduling
- Dimming
- Motion activation
- Voice control
- Colour-temperature adjustment
- Energy monitoring
- Automated nighttime scenes
However, they also introduce:
- Compatibility requirements
- Firmware updates
- Network dependence
- Account security
- More complex troubleshooting
- Potential replacement problems
A useful smart-bathroom setup might include:
- Normal wall controls
- Optional app control
- A low-brightness night scene
- Timed fan operation
- Adjustable mirror lighting
Avoid adding complexity where a conventional switch would be more reliable.
Step 15: Plan Lighting for Small Bathrooms
A small bathroom does not necessarily need many fixtures.
A practical combination may include:
- One general ceiling fixture
- Good mirror lighting
- Dedicated shower lighting where the enclosure needs it
- Optional low-level night lighting
Avoid Visual Overcrowding
Too many decorative fixtures can make a small ceiling or wall feel busy.
Choose fittings with:
- Appropriate scale
- Simple forms
- Good diffusion
- Suitable output
Use the Mirror to Support Light
A well-positioned mirror can reflect light deeper into the room.
However, it can also reflect:
- Exposed lamps
- Toilet area
- Clutter
- Shower glare
Review the complete reflection before finalising both the mirror and fixtures.
Step 16: Plan Lighting for Large Bathrooms
A larger bathroom may need separate zones.
Possible zones include:
- Double vanity
- Shower
- Bath
- Dressing area
- Toilet enclosure
- Storage wall
- Makeup station
Use consistent fixture finishes or design language so the room feels coordinated.
The lighting layers do not have to be identical, but they should appear deliberate.
For example:
- Decorative vanity lights
- Simple ceiling downlights
- Discreet shower fixture
- Soft bath-area wall light
Step 17: Consider Different Users
Children
Consider:
- Easy-to-reach switches
- Clear general lighting
- Night lighting
- Avoiding fragile exposed bulbs
- Secure fixtures
- Reduced glare
Electrical products should remain inaccessible where required, and outlets should comply with local safety requirements.
Older Adults
The bathroom may benefit from:
- More even illumination
- Reduced glare
- Clear floor visibility
- Strong task lighting
- Easy controls
- Night-route lighting
- Minimal sharp contrast between bright and dark zones
This is general design guidance, not medical or accessibility advice.
A shared bathroom may need:
- Flexible brightness
- Good mirror coverage
- Multiple user positions
- Separate controls
- Storage lighting
- Night settings
Guest Bathrooms
Guest controls should be immediately understandable.
Avoid a system that requires:
- An app
- Voice commands
- Several unfamiliar scenes
- Hidden switches
Step 18: Select Fixtures for the Actual Environment
Before buying any bathroom light, check:
- Intended location
- Damp- or wet-location suitability
- IP rating where applicable
- Product listing or certification
- Voltage
- Dimming compatibility
- Lamp replaceability
- Driver access
- Warranty
- Installation instructions
- Local electrical requirements
Do not assume that every product described as a “bathroom light” is suitable for every part of a bathroom.
A fixture appropriate above a vanity may not be approved for a shower enclosure.
Step 19: Include Electrical Protection
Water increases the consequences of unsafe electrical installation.
In US homes, ground-fault circuit interrupters are used in bathrooms and other potentially wet areas to reduce electric-shock risk. The CPSC explains that a GFCI quickly interrupts power when it detects leakage current.
In the UK, Electrical Safety First states that circuits in or passing through bathrooms and shower rooms require RCD protection under current wiring requirements.
The appropriate protection, wiring method and fixture placement must be determined according to the jurisdiction and the specific installation.
Fixed bathroom electrical work should be completed by an appropriately qualified electrician.
Step 20: Test the Lighting Before Final Completion
Whenever possible, test fixture positions before walls and ceilings are completely finished.
Use temporary lamps or marked positions to review:
- Facial shadows
- Mirror glare
- Shower brightness
- Dark corners
- Door shadows
- Reflections in glass
- Bath-area comfort
- Night visibility
- Switch locations
Test at Different Times
Review the bathroom:
- In daylight
- After sunset
- Early morning
- With the shower screen closed
- With the door open and closed
- With all lights operating
- With only the vanity lighting
- With the nighttime setting
A plan that works under one condition may reveal problems under another.
Common Bathroom-Lighting Mistakes
1. Using Only One Ceiling Light
Why it fails: It may leave the face shadowed and the shower dark.
Better approach: Combine general lighting with dedicated vanity and wet-area lighting where required.
2. Placing a Downlight Directly Above the Mirror User
Why it fails: It can create shadows beneath the eyes, nose and chin.
Better approach: Add balanced light beside or across the mirror.
3. Choosing Fixtures Before Checking Their Ratings
Why it fails: A decorative fitting may be unsuitable for moisture exposure or the proposed bathroom zone.
Better approach: Confirm location suitability and local requirements before purchase.
4. Using a Backlit Mirror as the Only Vanity Light
Why it fails: Some backlit mirrors illuminate the wall more than the face.
Better approach: Check whether the mirror provides meaningful forward light.
Why it fails: Skin tones and finishes may look inconsistent.
Better approach: Choose a coordinated colour-temperature plan.
6. Ignoring Mirror Glare
Why it fails: Bright points may reflect directly into the eyes.
Better approach: Use diffused fixtures and test the normal viewing position.
7. Leaving the Shower Dark
Why it fails: Enclosure walls, curtains or dark surfaces may block the main ceiling light.
Better approach: Assess whether the shower needs a dedicated appropriately rated fixture.
8. Making Every Light Equally Bright
Why it fails: The room can feel flat and uncomfortable at night.
Better approach: Use separate layers and controls.
9. Adding Too Many Downlights
Why it fails: The ceiling becomes visually busy without necessarily improving useful illumination.
Better approach: Position fixtures around tasks and circulation.
10. Forgetting Maintenance
Why it fails: Integrated products may be difficult to repair or replace.
Better approach: Review lamp, driver and component access before installation.
11. Depending Only on Smart Controls
Why it fails: App, account or network problems can make simple bathroom use unnecessarily difficult.
Better approach: Retain reliable physical controls.
12. Treating Electrical Safety as a Styling Decision
Why it fails: Appearance does not indicate whether a fixture or installation is suitable.
Better approach: Use certified products and qualified installation.
Example Bathroom-Lighting Plans
These are illustrative starting points, not universal electrical plans.
Small Bathroom With a Shower
Possible lighting layers:
- Diffused general ceiling fixture
- Mirror light or side lights
- Appropriately rated shower light if needed
- Optional low-level night light
Standard Family Bathroom
Possible lighting layers:
- Two or more carefully positioned general fixtures
- Balanced vanity lighting
- Shower or bath-zone lighting where suitable
- Dimming for ambient use
- Low-level nighttime lighting
Large Bathroom With Separate Bath and Shower
Possible lighting layers:
- Zoned general ceiling lighting
- Dedicated double-vanity lighting
- Shower light
- Softer bath-area lighting
- Storage or niche lighting
- Independent controls
Powder Room
A powder room without a bath or shower may focus on:
- Mirror lighting
- General ceiling or wall lighting
- Decorative accent lighting
- Comfortable colour and glare control
Electrical requirements still depend on the room and jurisdiction.
Bathroom-Lighting Planning Checklist
Before purchasing fixtures, confirm:
- Bathroom layout measured
- Vanity position confirmed
- Mirror size selected
- Natural light assessed
- Main tasks identified
- Ambient lighting planned
- Vanity lighting planned around the face
- Shower lighting assessed
- Bath lighting considered
- Fixture ratings checked
- Local bathroom zones or location rules reviewed
- Colour temperature coordinated
- Colour rendering considered
- Glare reviewed
- Dimming requirements identified
- Night lighting planned
- Switches grouped logically
- Smart controls remain optional
- Electrical protection confirmed
- Qualified installer consulted
- Maintenance and replacement access checked
- Final positions tested where possible
Final Thoughts
Good bathroom lighting should make everyday tasks easier without making the room feel harsh.
Begin with the vanity because clear, balanced facial light is difficult to correct after mirrors and wiring have been installed. Add general ceiling lighting based on the room’s actual layout, then assess whether the shower, bath, storage or nighttime route needs separate illumination.
Do not select wet-area fixtures based on appearance alone. Confirm their rating, installation position and compatibility with local electrical requirements before purchase.
The most effective bathroom-lighting plan is usually not the one with the greatest number of fixtures. It is the one that places the right type of light where each activity happens and gives users simple control over brightness and atmosphere.
For more practical guidance on creating functional interiors, visit the Housemadeclear Interior Design section and learn more about the professional experience behind the site on the Meet Charu page.
Review the HouseMadeClear Disclaimer before making electrical, structural or renovation decisions.
Frequently Asked Questions
What is the best lighting for a bathroom vanity?
Lighting on both sides of the mirror can provide balanced facial illumination and reduce shadows. Where side lighting is not practical, use a well-diffused fixture above the mirror and check that it spreads light evenly across the face.
Should bathroom lights be warm white or cool white?
There is no universal choice. Warmer light can create a softer atmosphere, while a neutral or whiter light may support detailed vanity tasks. Avoid mixing noticeably different light colours without a deliberate plan.
Do I need a separate light inside the shower?
A shower may need its own light if walls, curtains, dark tiles or distance from the main ceiling fixture make it poorly illuminated. Any fixture installed in or near the shower must be suitable for that specific location.
Can I use a normal ceiling light in a bathroom?
Only when the fitting is appropriate for the proposed position and complies with local electrical requirements. A fixture suitable for a general bathroom ceiling may not be suitable inside a shower or close to a bath.
Are backlit mirrors enough for bathroom lighting?
Not always. Some backlit mirrors create decorative wall illumination but provide limited forward light on the face. Check the product’s actual lighting direction and brightness.
Where should vanity lights be positioned?
Side lights should generally be positioned to illuminate the face from both directions. The exact height and spacing depend on the mirror, fixture, users and wall layout. Above-mirror lights should spread illumination across the vanity rather than produce a narrow beam.
Should bathroom lighting be dimmable?
Dimming can be useful for nighttime visits, baths and changing natural-light conditions. Check that the light source, driver and dimmer are compatible.
What type of light can be used over a shower?
Use only a fixture specifically suitable for the shower location, moisture exposure and applicable bathroom zone or wet-location requirements. A qualified electrician should confirm the specification and installation.